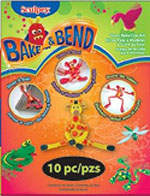
When it comes to making DIY texture sheets, my material of choice is Sculpey's Bake and Bend. I know, it's supposed to be a clay destined for children, but it does hold detail fairly good and also, well, as the name says, it's a bendable clay - that means that even after you bake it, it will bend quite a bit without breaking. It's wonderful to capture unusual textures that you find around you, but also to make negatives from other texture sheets that you already have. It does have a few tricks to work with though.
1. It conditions pretty much like the regular Sculpey brand clay. But, do not try to get it into sheets too thin. It's not stretchy like regular polymer clay and the texture will break through if it's too thin
2. As a piece of advice, if you are going to use the pasta machine not just the plain roller, pass it through between two sheets of wax paper or laminate. It has the tendency to crumble and you will have to do a very thorough cleaning of your pasta machine afterwards. I find it much easier to just use lollipop sticks to the sides of the sheet so my roller would go at an even distance from the working tile.
3. The best is to make your sheets at about 1 1/2 thick compared to the thicker setting on your pasta machine. I usually start with two lollipop sticks. It does get a little bit thinner than that once I apply the texture, and gets to be the desired thickness.
4. As for any other polymer clay, to keep your texture sheet completely flat when baking, place it between tiles and paper, as in tile-paper-piece-paper-tile. You want to place paper there because you don't want a shiny surface where the clay comes in contact with the tile. Regular printing paper is just fine.
And here's an example of using the Bake and Bend for making textures of bars for bezels.


